


Wireless Label Printing, Hooray!
Originally posted by Serena on ohplesiosaur.com.
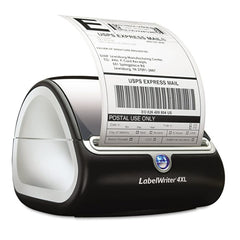
Hey fellow small biz owners! Sick of plugging in your label printer every time you want to print shipping labels? I had my Dymo 4XL label printer right next to the computer and it was a drag. I'm moving to a new studio space (!!) and I wanted to keep my label printer near my order packaging station, so I needed another solution.
Fact: There are no wireless 4x6" shipping label printers. It's frustrating, and someone should make one. But in the meantime, if you're a little tech-savvy (or know someone who is), just DIY that sh*t by setting up a teeny tiny printer server!
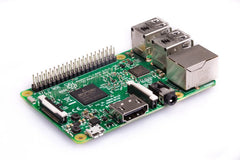
Basically, I set up a Raspberry Pi as a print server. The whole project costs about $60 and took us (not advanced users) about an hour. If you've got some experience with this, I'm sure it's much quicker.
SUPPLIES:
You'll need...
- Dymo 4XL label printer
- Raspberry Pi 3
- power supply for Raspberry Pi
- case for Raspberry Pi
- 16GB micro SD card with adapter (usually sold together)
- computer with SD card slot (just for setup)
- monitor or TV with HDMI input (just for setup)
- wireless (via USB dongle) or wired keyboard & mouse (just for setup)
INSTRUCTIONS:
1. Follow these instructions to format your micro SD card and install Raspbian (don't install NOOBS).
2. Put your Pi into its case. Insert the micro SD card you just set up. Connect the display, keyboard, and mouse. Connect your Pi's power supply and plug it in. The Pi will start up as soon as you plug in the power cord, and everything should be displayed on your monitor/TV.
3. Follow these instructions to set up the Pi as a print server.
Good to know:
If you're assigning a static IP for the Pi (recommended), you'll need to access your router admin. Type your router's IP address into your browser, then log in. To assign the static IP to the Pi, I googled my router brand and "assign static IP" for instructions. I'm not sure if this step is necessary, but we did it since it was recommended and it took us more time than all the other steps. Again, probably really easy for people who know this stuff.
4. That's it! Since you've set it up for your network, you won't need to use the monitor, keyboard, or mouse again unless you need to make changes to the network or settings. You can administer the print server remotely from any computer on your network.
One final note: The Raspberry Pi has 4 USB slots, so I'm going to get more mileage out of it by connecting a second thermal printer to print little paper gift notes when requested by customers. If you've got a very big shipping operation, you could also connect multiple printers to it and have them all on your network.
Leave a comment